

Welcome to the First of Many Supplemental Slimefun Guides!
Notice
If you haven’t already, make sure to read @Trump15024 ’s guide [here] to get yourself started and familiar with how to navigate your sf guide! This series of guides will only show you how to achieve the maximum amount of automation that is legal on the server, and how to learn everything from setting up your basic machines to building your very own Nuclear Reactor!
Introduction
Now that you’re comfortable with the slimefun GUI, it’s time to get started in the slimefun category Basic Machines. Once you’ve played around with slimefun a bit and read @Trump15024 ‘s guide, you’ll know that voting everyday can net you up to 120 levels, which you can use to unlock slimefun items. The Very First items you want to be unlocking with this daily XP are all of the Basic Machines. In this short introductory guide, I will be covering how to build and use Basic Machines like the Enhanced Crafting Table, as well as how to use the Output Chest in your upcoming slimefun adventures!
Creation
One of the most frequently asked questions regarding Basic Machines is how to build them. For example, when we look at the recipe for the Enhanced Crafting Table, it shows a crafting table on top of a dispenser [See Figure 1], but when we put this recipe in a vanilla crafting table, nothing happens. The Key to this problem is to look at the seemingly random block placed on the left of the GUI, which in this case, is a brick . When we hover our cursor over this block, it tells us that this recipe is a Multiblock and is NOT crafted [See Figure 2] . This is an incredibly important concept, as every single recipe in slimefun has to be made in a specific machine, not just in the crafting table. Thus, the fully created Enhanced Crafting Table would look like what you see in Figure 3, a Multiblock with a Vanilla Crafting Table on top of a Vanilla Dispenser.
Use
Now that you’ve made your Enhanced Crafting Table, it’s time to learn how to use it. Although this may seem complicated, in almost every Basic Machine, the GUI that you will be interacting with is in the Dispenser, and to craft the item, I will have to right-click a different block in the multiblock (Usually a fence or trapdoor). This concept is best explained with pictures to help you understand. In this example, we will be making 1 Cloth by putting 1 wool block in the Enhanced Crafting Table and using it. First, as we see in Figure 4, I put my 1 wool block inside the Dispenser. Then, to use the Enhanced Crafting Table, I exit the dispenser, leaving my wool block inside, and right click the crafting table which you can see in Figure 5. Finally, as you can see in Figure 6, I look back inside the Dispenser to find that my 1 wool block has been crafted into the 8 cloth that I wanted.
The Output Chest
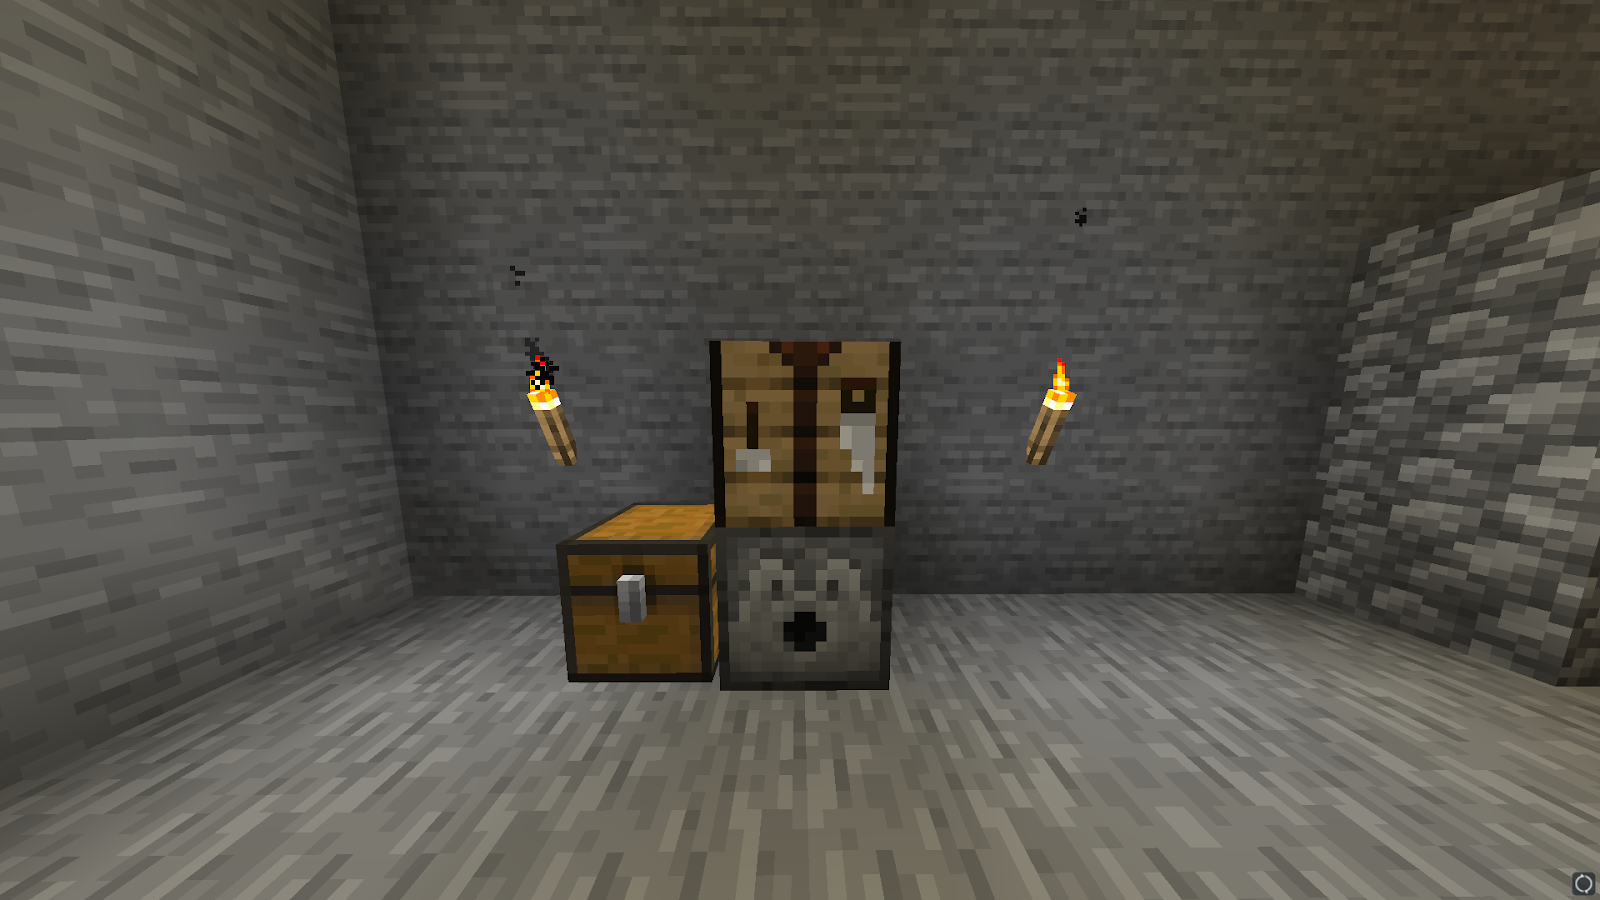
So, you know how to create and use your Multiblock Basic Machines, but you might have noticed that since my Enhanced Crafting Table outputs the result back into the Dispenser, my recipe might get messed up the next time I got to click it, and having to remove the resulting item every time I use my Basic Machine seems way too tedious. This is an example of a situation where we can use the Output Chest, an item listed in Basic Machines that isn’t really one of the machines. The description of the Output Chest says as follows: “A Basic Machine will try to put items in this chest if it’s placed adjacent to the dispenser.” So, as you can see in Figure 7, I can place my Output Chest adjacent to the dispenser of my Enhanced Crafting Table, and all the items that the table crafts will automatically be placed in the Output Chest regardless of how many squares of the dispenser a recipe fills.
Media Supplements Mentioned (Figures)
Figure 1:

Figure 2:

Figure 3:
Figure 4:

Figure 5:

Figure 6:

Figure 7: